Migrate to Android Studio from Eclipse
Migrating your projects to Android Studio requires adapting to a new project structure, build system, and IDE functionality. To simplify the migration process, Android Studio provides an import tool so you can quickly move your existing code into Android Studio projects and Gradle-based build files.
Android Studio Basics
Here are some of the key differences you should be aware of as you prepare to migrate to Android Studio.
Project and module organization
Android Studio is based on the IntelliJ IDEA IDE. To become familiar with the IDE basics, such as navigation, code completion, and keyboard shortcuts, see Meet Android Studio.
Android Studio does not use workspaces, so separate projects open in separate Android Studio windows. Android Studio organizes code into projects, which contain everything that defines your Android app, from app source code to build configurations and test code. Each project contains one or more modules, which allow you to divide your project into discrete units of functionality. Modules can be independently built, tested, and debugged.
For more information about Android Studio projects and modules, see the Projects Overview.
Gradle-based build system
Android Studio’s build system is based on Gradle and uses build configuration files written in Groovy syntax for ease of extensibility and customization.
For more information about using and configuring Gradle, see Configure Your Build.
Dependencies
Library dependencies in Android Studio use Gradle dependency declarations and Maven dependencies for well-known local source and binary libraries with Maven coordinates. For more information see, Configure Build Variants.
Test code
With Eclipse ADT, instrumentation tests are written in separate projects and integrated through the <instrumentation> element in your manifest file. Android Studio provides an androidTest/ directory in your project's main sourceset so you can easily add and maintain your instrumentation test code within the same project view. Android Studio also provides a test/ directory in your project's main sourceset for local JVM tests.
Migration Prerequisites
Before migrating your app to Android Studio, review the following steps to make sure your project is ready for conversion, and verify you have the tool configuration you need in Android Studio:
In Eclipse ADT:
- Make sure the Eclipse ADT root directory contains the
AndroidManifest.xmlfile. Also, the root directory must contain either the.projectand.classpathfiles from Eclipse or theres/andsrc/directories. - Build your project to ensure your latest workspace and project updates are saved and included in the import.
- Comment out any references to Eclipse ADT workspace library files in the
project.propertiesor.classpathfiles for import. You can add these references in thebuild.gradlefile after the import. For more information, see Configure Your Build. - It may be useful to record your workspace directory, path variables, and any actual path maps that could be used to specify any unresolved relative paths, path variables, and linked resource references. Android Studio allows you to manually specify any unresolved paths during the import process.
In Android Studio:
- If you don't have it, download Android Studio. If you do have Android Studio, verify that it is the latest stable release by clicking Help > Check for Updates (on Mac, Android Studio > Check for Updates).
- Because Android Studio does not migrate any third-party Eclipse ADT plugins, make a note of any third-party plugins you use in Eclipse. You can check for equivalent features in Android Studio or search for a compatible plugin in the IntelliJ Android Studio Plugins repository. Use the File > Settings > Plugins menu option to manage plugins in Android Studio.
- If you plan to run Android Studio behind a firewall, be sure to set the proxy settings for Android Studio and the SDK Manager. Android Studio requires an internet connection for Setup Wizard synchronization, 3rd-party library access, access to remote repositories, Gradle initialization and synchronization, and Android Studio version updates. For more information, see Proxy Settings.
Import Projects to Android Studio
You should decide how you will import your existing Eclipse ADT projects depending on their structure:
- If you have multiple related projects sharing the same workspace in Eclipse ADT, import the first project as a project, then add subsequent related projects as modules within that project.
- If your Eclipse ADT projects share dependencies within the same workspace but are not otherwise related, import each Eclipse ADT project individually into Android Studio as a separate project. Android Studio maintains the shared dependencies across the newly created projects as part of the import process.
Import as a Project:
- Start Android Studio and close any open Android Studio projects.
- From the Android Studio menu click File > New > Import Project.
- Alternatively, from the Welcome screen, click Import project (Eclipse ADT, Gradle, etc.).
- Select the Eclipse ADT project folder with the
AndroidManifest.xmlfile and click Ok.
- Select the destination folder and click Next.

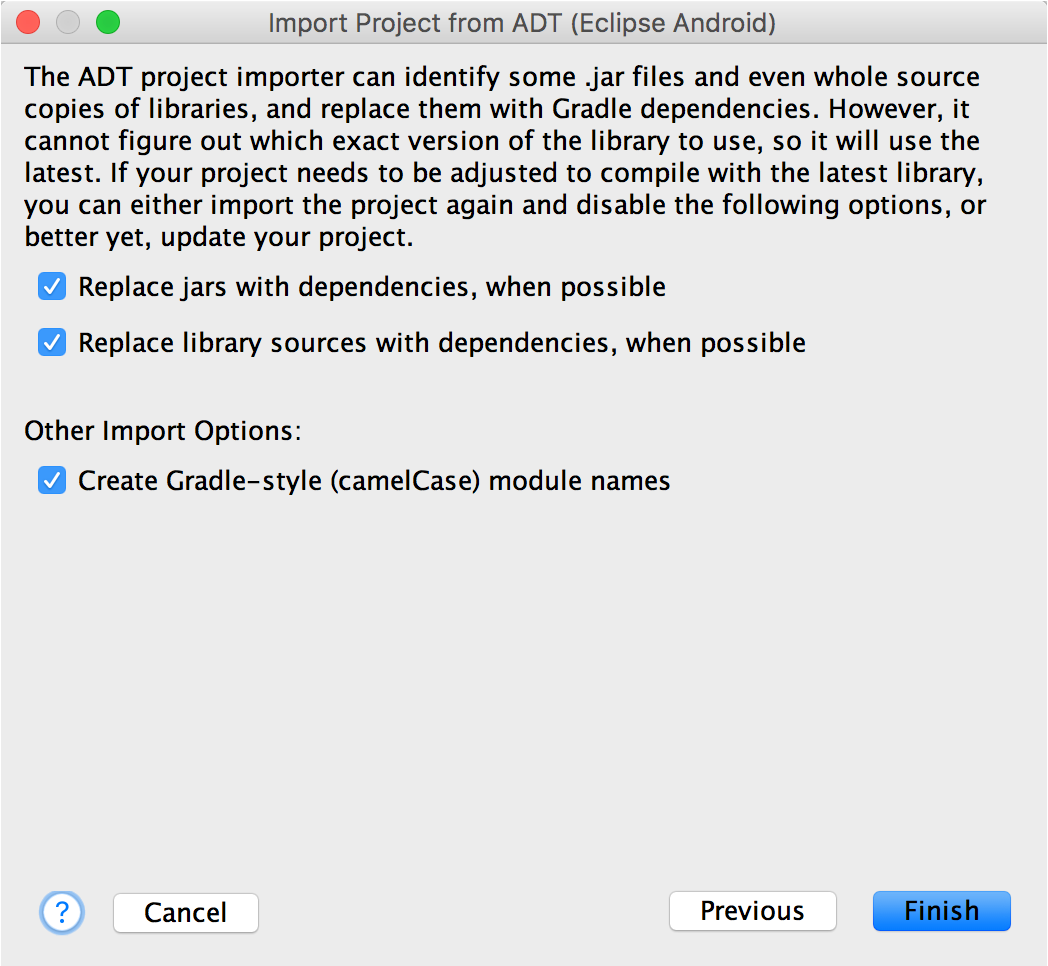
- Select the import options and click Finish.
The import process prompts you to migrate any library and project dependencies to Android Studio, and add the dependency declarations to the
build.gradlefile. See Create an Android Library for more information about this process.The import process also replaces any well-known source libraries, binary libraries, and JAR files that have known Maven coordinates with Maven dependencies, so you no longer need to maintain these dependencies manually. The import options also allow you to enter your workspace directory and any actual path maps to handle any unresolved relative paths, path variables, and linked resource references.
Android Studio imports the app and displays the project import summary. Review the summary for details about the project restructuring and the import process.
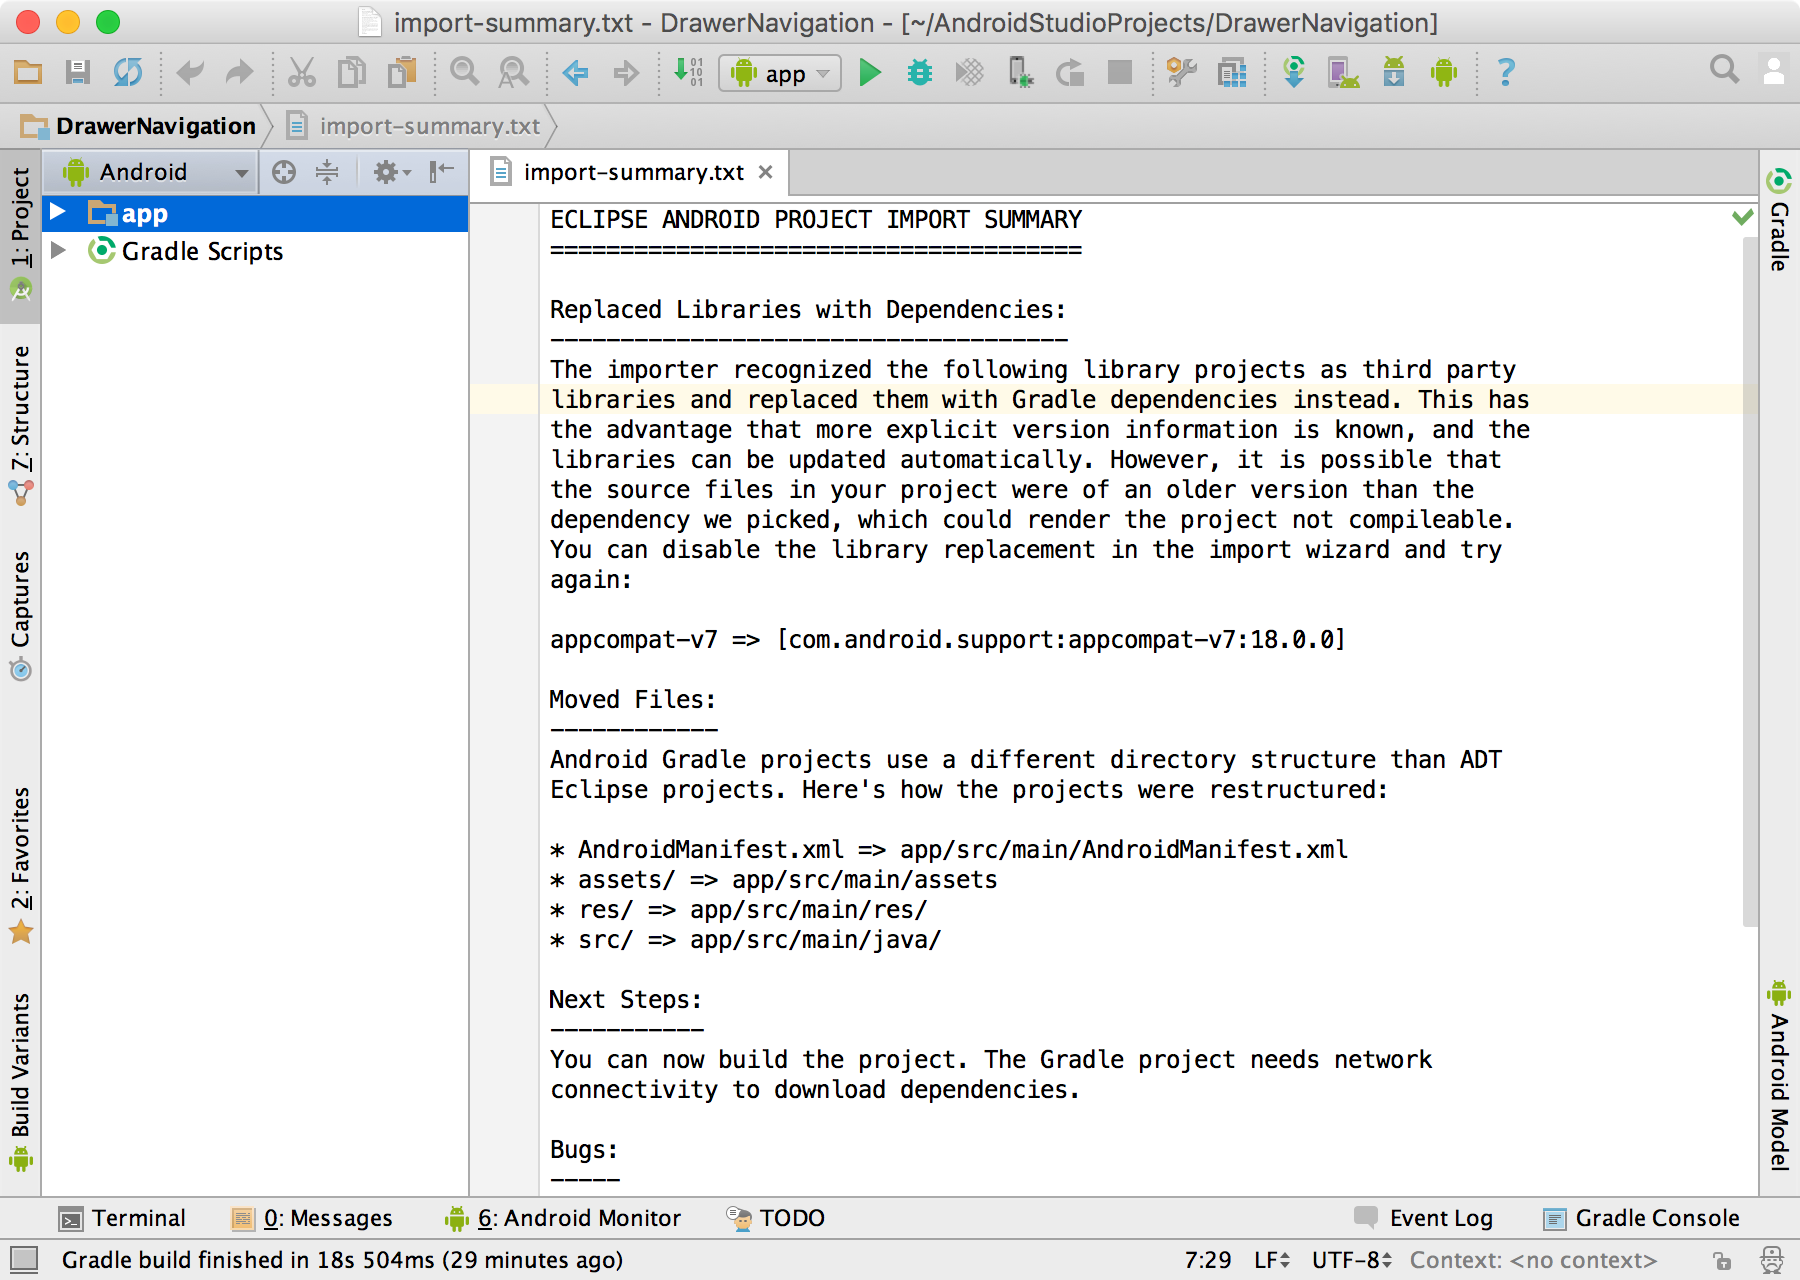
After importing the project from Eclipse ADT into Android Studio, each app module folder in Android Studio contains the complete source set for that module, including the src/main/ and src/androidTest/ directories, resources, build file, and Android manifest. Before starting app development, you should resolve any issues shown in the project import summary to make sure the project re-structuring and import process completed properly.
Import as a Module:
- Start Android Studio and open the project you’d like to add the module to.
- From the Android Studio menu click File > New > Import Module.
- Select the Eclipse ADT project folder with the
AndroidManifest.xmlfile and click Ok. - Modify the module name if desired, and click Next.
- The import process prompts you to migrate any library and project dependencies to Android Studio, and add the dependency declarations to the
build.gradlefile. For more about migrating library and project dependencies, see Create an Android Library. The import process also replaces any well-known source libraries, binary libraries, and JAR files that have known Maven coordinates with Maven dependencies, so you no longer need to maintain these dependencies manually. The import options also allow you to enter your workspace directory and any actual path maps to handle any unresolved relative paths, path variables, and linked resource references. - Click Finish.
Validate imported projects
After completing the import process, use the Android Studio Build and Run menu options to build your project and verify the output. If your project is not building properly, check the following settings:
- Verify the installed versions of your tools match the settings for your Eclipse project by opening the SDK Manager (click the Android SDK Manager button in Android Studio or Tools > Android > SDK Manager). Android Studio inherits the SDK Manager and JDK settings from your imported Eclipse project.
- To verify additional Android Studio Settings, click File > Project Structure and inspect the following:
- Under SDK Location verify Android Studio has access to the correct SDK, NDK, and JDK locations and versions.
- Under Project verify the Gradle version, Android Plugin version, and related repositories.
- Under Modules verify the app and module settings, such as signing configuration and library dependencies.
- If your project depends on another project, make sure that dependency is defined properly in the
build.gradlefile in the app module folder. For more information about defining dependencies, see Configure Build Variants.
If there still are unexpected issues when building and running your project in Android Studio after you have checked these settings, consider modifying the Eclipse ADT project and re-starting the import process.
Note: Importing an Eclipse ADT project to Android Studio creates a new Android Studio project and does not impact the existing Eclipse ADT project.
Next Steps
Depending on your project and workflow, you may wish to read more about using version control, managing dependencies, signing and packaging your app, or configuring and updating Android Studio. To get started using Android Studio, read Meet Android Studio.
Configure Version Control
Android Studio supports a variety of version control systems, including Git, GitHub, CVS, Mercurial, Subversion, and Google Cloud Source Repositories.
After importing your app into Android Studio, use the Android Studio VCS menu options to enable VCS support for the desired version control system, create a repository, import the new files into version control, and perform other version control operations:
- From the Android Studio VCS menu, click Enable Version Control Integration.
- Select a version control system to associate with the project root from the drop down menu, then click OK. The VCS menu now displays a number of version control options based on the system you selected.
Note: You can also use the File > Settings > Version Control menu option to set up and modify the version control settings.
For more information about working with Version Control see IntelliJ Version Control Reference.
Android Support Repository and Google Play Services Repository
While Eclipse ADT uses the Android Support Library and Google Play services Library, Android Studio replaces these libraries during the import process with the Android Support Repository and Google Repository to maintain compatible functionality and support new Android features. Android Studio adds these dependencies as Maven dependencies using the known Maven coordinates, so these dependencies do not require manual updates.
In Eclipse, in order to use a Support Library, you must modify your project's classpath dependencies within your development environment for each Support Library you want to use. In Android Studio, you no longer need to copy library sources into your own projects, you can simply declare a dependency and the library is automatically downloaded and merged into your project. This includes automatically merging in resources, manifest entries, ProGuard exclusion rules, and custom lint rules at build time. For more information about dependencies, see Configure Build Variants.
App Signing
If your app used a debug certificate in Eclipse ADT, Android Studio continues to reference that certificate. Otherwise, the debug configuration uses the Android Studio generated debug keystore, with a known password and a default key with a known password located in$HOME/.android/debug.keystore. The debug build type is set to use this debug configuration automatically when you run or debug your project from Android Studio.
When building your app for release, Android Studio applies the release certificate used in Eclipse ADT. If no release certificate was located during the import process, add the release signing configuration to the build.gradle file or use the Build > Generate Signed APK menu option to open theGenerate Signed APK Wizard. For more information about signing your app, see Signing Your Applications.
Adjusting Android Studio’s Maximum Heap Size
By default, Android Studio has a maximum heap size of 1280MB. If you are working on a large project, or your system has a lot of RAM, you can improve performance by increasing the maximum heap size in the VM options for Android Studio.
For more information about configuring Android Studio settings, see Configure Android Studio and Configuring Android Studio.
Software Updates
Android Studio updates separately from the Gradle plugin, the build tools, and the SDK tools. You can specify which versions you would like to use with Android Studio.
By default, Android Studio provides automatic updates whenever a new stable version is released, but you can choose to update more frequently and also receive preview or beta versions.
For more information about updating Android Studio and using preview and beta versions, see Stay Updated.
'User Guide' 카테고리의 다른 글
| 프로젝트 관리 Manage Your Project (6) (0) | 2016.06.01 |
|---|---|
| 개발자 워크플로우 기본 Developer Workflow Basics (5) (0) | 2016.06.01 |
| IDE와 도구 업데이트 하기 Update the IDE and Tools (4) (0) | 2016.06.01 |
| 안드로이드 스튜디오 컨피규어 하기 Configure Android Studio (3) (0) | 2016.06.01 |
| 안드로이드 스튜디오 만나기 Meet Android Studio (1) (0) | 2016.06.01 |


댓글